LevelDB Explained - Preparing the Development Environment
LevelDB is an excellent LSM Tree storage component developed in C++. Although its overall codebase is not large, its design is ingenious and worth studying. During the process of reading the source code, I have compiled a series of articles to gradually break down the implementation details of LevelDB. However, before reading the code, it’s best to prepare the entire development environment.
This article will start from the most basic step of pulling the code, recording my process of preparing the entire environment, including configuring the VSCode IDE and using the clangd plugin, as well as how to configure compilation options. Then, through a simple read and write code demo, we’ll briefly use LevelDB to gain a perceptual understanding of this library. Additionally, we’ll introduce how to run test cases. LevelDB’s test cases are well-written, and during the code reading process, we can use these cases to better understand the code.
Source Code Compilation
First is pulling the code. Here we use git clone --recurse-submodules, which can pull all submodules at once. Although LevelDB’s implementation doesn’t depend on third-party libraries, benchmark is used for pressure testing and googletest is used for functional testing, both of which are introduced as submodules.
If you encounter network issues when pulling the code, such as the following, you need to bypass the firewall first. You can refer to the methods in the article Safe, Fast, and Affordable Access to ChatGPT, Latest and Most Comprehensive Practical Tutorial!.
1 | Cloning into '/root/leveldb/third_party/googletest'... |
Next is compiling the entire source code. LevelDB uses cmake for building. To facilitate later code reading, we add -DCMAKE_EXPORT_COMPILE_COMMANDS=1 during compilation, which will generate a compile_commands.json file. This file is a configuration file for tools like clangd and can help IDEs like VSCode better understand the code. With this file, features like code jumping and auto-completion will work better. Additionally, to facilitate debugging with GDB, we add -DCMAKE_BUILD_TYPE=Debug to generate libraries with debugging information.
You can refer to the complete command below:
1 | git clone --recurse-submodules [email protected]:google/leveldb.git |
The CMAKE_INSTALL_PREFIX option is used to specify the installation directory. Here it’s specified as the current directory (build directory), so after compilation, the generated library files and header files will be placed in the build directory for convenient future use.
There are quite a few options for CMake building here. For example, BUILD_SHARED_LIBS is used to control whether the generated library is a static link library (.a file) or a dynamic link library (.so file). If BUILD_SHARED_LIBS is not explicitly set in CMakeLists.txt or through command-line arguments passed to CMake, CMake’s default behavior is usually not to enable shared library building. You can use cmake -DBUILD_SHARED_LIBS=ON .. on the command line to enable shared library building.
IDE Configuration
I personally use vscode quite often. As a code IDE, vscode can be said to be very user-friendly. For C++ projects, although Microsoft provides an official C++ plugin for convenient code jumping and other features, from my personal experience, it’s not very user-friendly. Here, I strongly recommend using clangd to read C++ code. You only need to install Clangd on the server, then install the clangd plugin in vscode, and use it in conjunction with the compile_commands.json compilation database file generated by Cmake earlier.
Clangd is a language server based on the LLVM project, mainly supporting code analysis for C and C++. It can provide code completion, diagnostics (i.e., errors and warnings), code jumping, and code formatting features. Compared to Microsoft’s built-in C++ plugin, clangd responds very quickly and can achieve more precise jumping and warnings with the help of clang. It also supports using clang-tidy to perform static analysis on project code to discover potential errors.
For example, in the code below, clang-tidy found a suspicious issue: Suspicious usage of 'sizeof(A*)', and also provided the clang-tidy check rule item bugprone-sizeof-expression, which is used to check whether the use of sizeof expressions is correct.

Here, new_list itself is a pointer to a pointer, so new_list[0] is actually a pointer. sizeof(new_list[0]) is getting the size of the pointer, not the size of the element pointed to by the pointer. However, this is the intended design here, which is to set the initial value of the new bucket to nullptr. In fact, this rule is intended to prevent errors like the following:
A common mistake is to compute the size of a pointer instead of its pointee. These cases may occur because of explicit cast or implicit conversion.
For example, code like this:
1 | int A[10]; |
Overall, the code quality of LevelDB is very high, with very few clang-tidy prompts. It’s a world apart from business code, so it’s very worth learning.
LevelDB Read, Modify, Write
LevelDB is not a database like MySQL, nor does it support SQL queries and other features. It’s just a fast key-value storage library. LevelDB doesn’t come with client and server code. If you need to provide storage functionality, you need to implement the corresponding logic yourself. Additionally, it only supports single-process access to a specified database and does not support multi-process access.
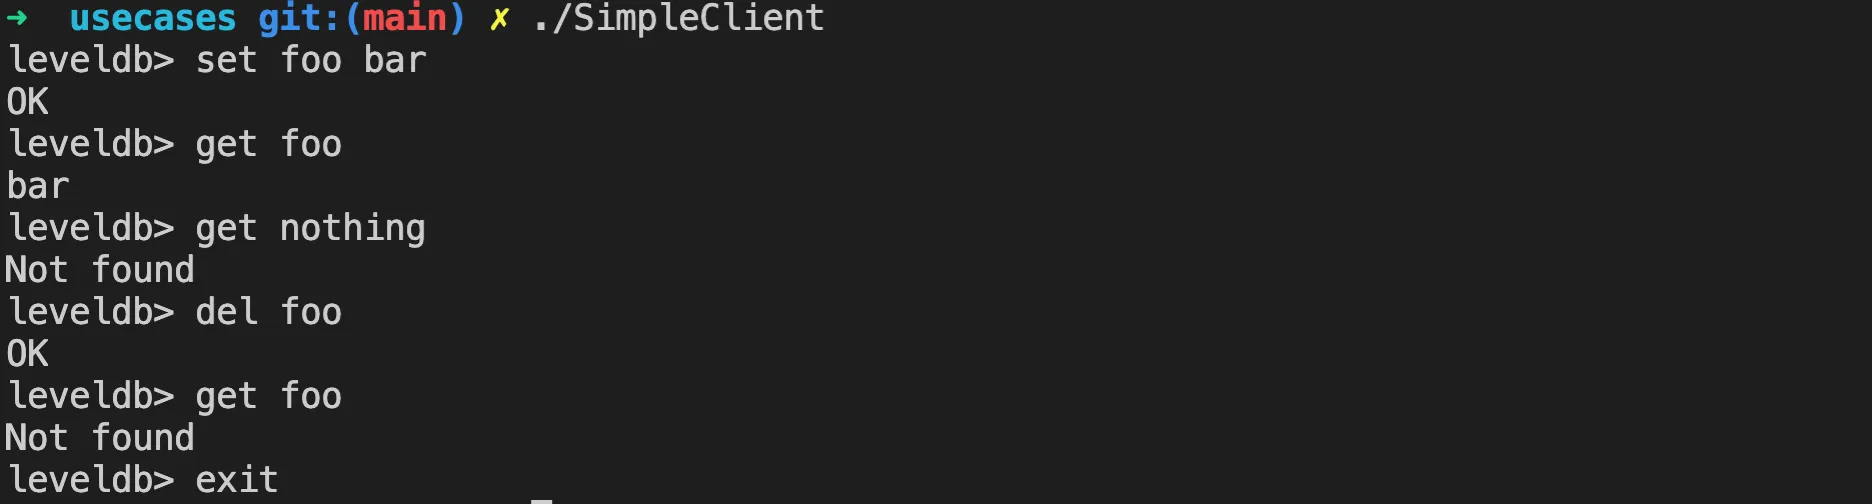
In the industry, LevelDB is generally used as an underlying dependency for storage components. For example, WeChat’s core storage paxosstore uses LevelDB to store data. Getting started with LevelDB is relatively simple. You just need to include the header file and then call the corresponding interfaces. The code below implements a simple command-line interface that uses the LevelDB library to read and write keys.
1 | // simple_client.cpp |
Here we use Cmake to build. You can refer to the following CMakeLists.txt file. Of course, the directories for include and lib libraries need to be changed according to the previously compiled directories.
1 | cmake_minimum_required(VERSION 3.10) |
Then you can use cmake --build . to compile the binary file. Of course, if you’re not used to cmake, you can also use gcc directly, but you need to manually specify the paths for header files and library files. Then execute as shown in the image below, you can operate LevelDB in a command-line client similar to redis.
You can see LevelDB’s data storage files in the db folder of the current directory, as follows:
1 | ls db |
We will explain LevelDB’s data storage method in detail later, and will also expand on the functions of these files. Let’s not go into details here.
Running Test Cases
So far, we have compiled the LevelDB library and written a simple read and write command-line interface using LevelDB. Next, let’s look at LevelDB’s test cases. LevelDB’s core code all has corresponding test cases, such as cache_test.cc in LRU cache, db_test.cc in db implementation, table_test.cc in table, and so on. The executable file build/leveldb_tests for test cases is generated along with the library using the previous compilation command.
Dynamic Library Dependencies
If you run leveldb_tests directly, it may prompt that the libtcmalloc dynamic library is missing. This is a memory allocator from Google Perftools, which LevelDB uses and needs to be installed on the system.
1 | ./build/leveldb_tests: error while loading shared libraries: libtcmalloc.so.4: cannot open shared object file: No such file or directory |
The installation command is also simple. For example, on a debian system, you can use the following command:
1 | sudo apt-get update |
After installation, you can use ldd to check if it can be found. If it’s normal as follows, you can run the binary.
1 | ldd ./build/leveldb_tests |
Before installing the library, it prompted libtcmalloc.so.4 => not found, but after installing the dynamic library, it automatically linked to the correct path. How is this achieved? This is because the binary file contains references to dynamic libraries, especially the name of the library and the required symbols (functions or data). The dynamic linker (usually ld-linux.so in Linux) is responsible for handling these references. It determines which libraries the binary file needs, and then loads the used libraries according to the specified paths and methods.
After we install the tcmalloc library, the dynamic library file libtcmalloc.so.4 is copied to the system’s library directory /usr/local/lib. Then the installation program executes ldconfig to update ld.so.cache, which contains path information for libraries to speed up library lookup. This way, when running the binary again, the dynamic linker checks the cache, finds the newly installed library, and resolves all relevant symbol references, thus completing the linking.
Modifying and Running
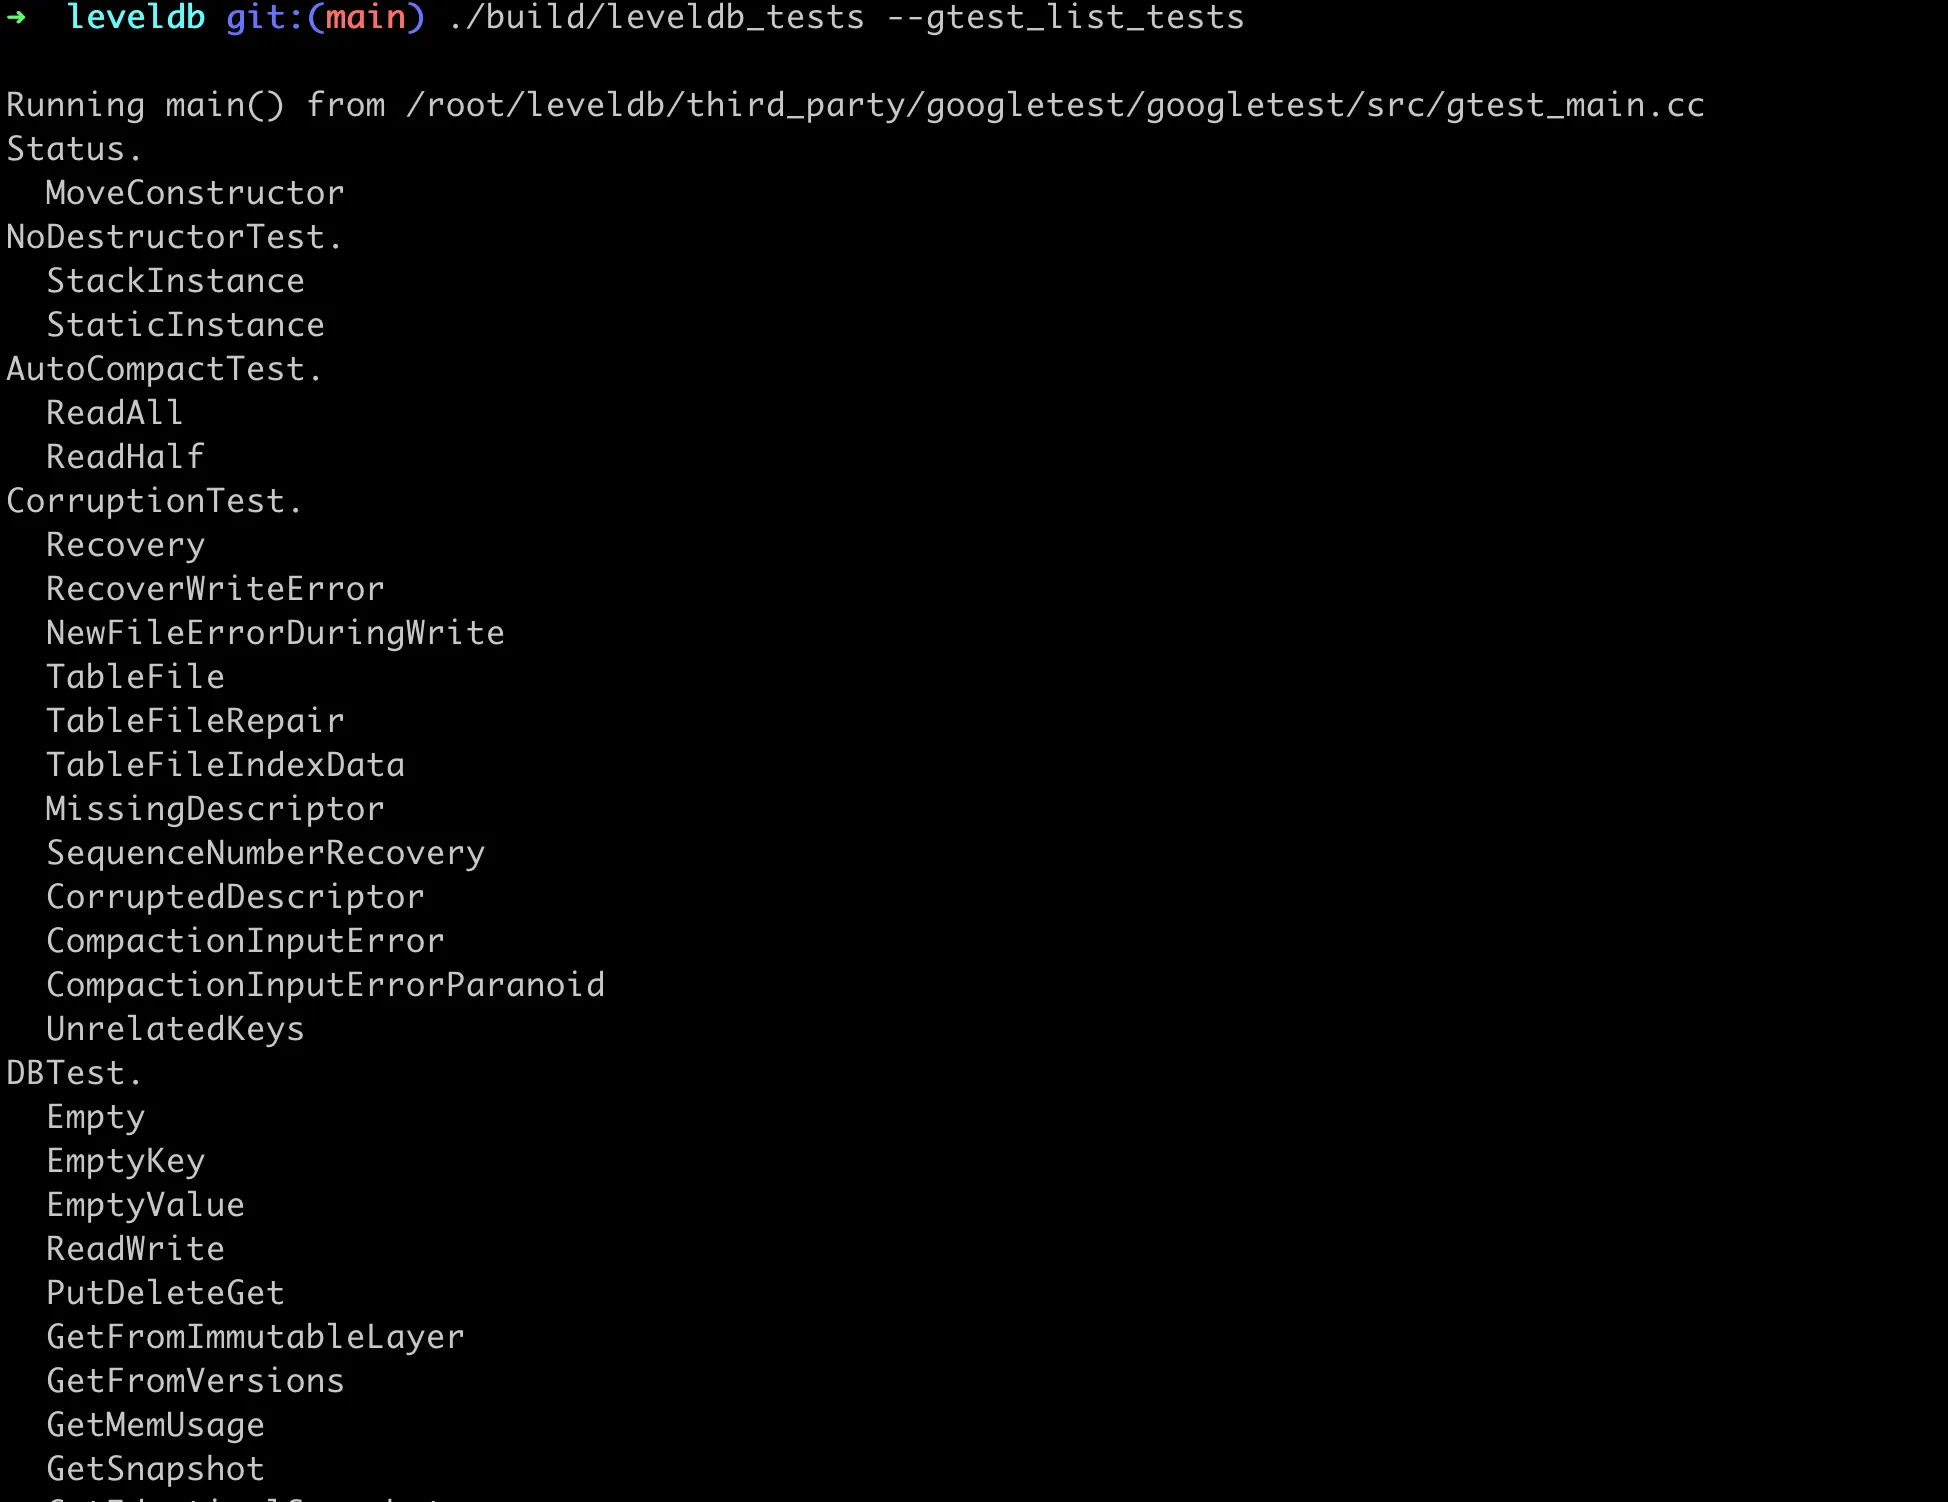
These functional test cases are all written using the gtest framework. We can view all the test cases using the --gtest_list_tests parameter. As shown in the image below:
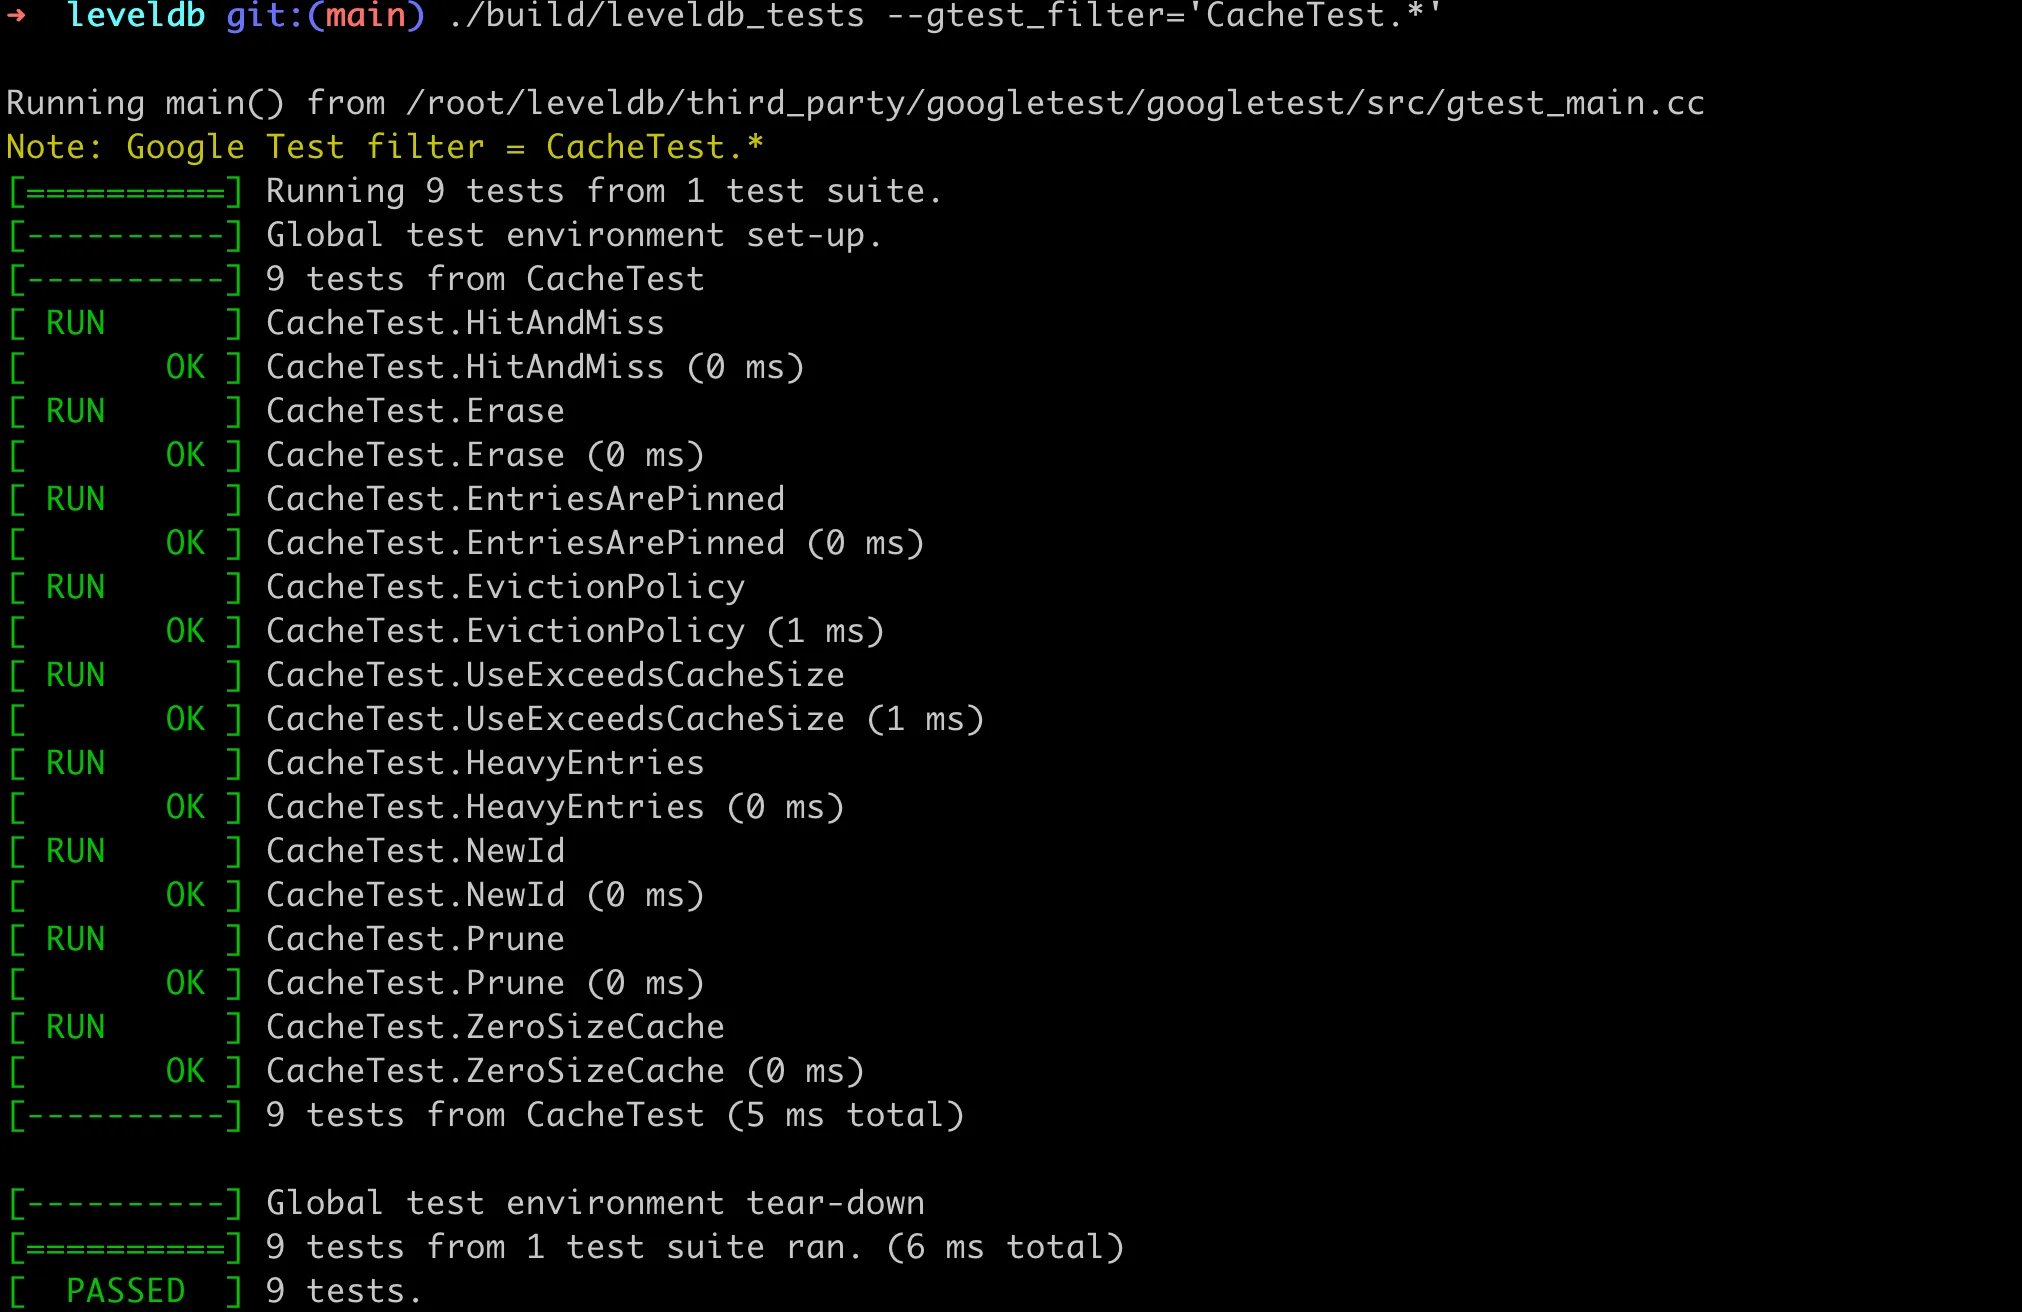
If you run leveldb_tests directly, it will execute all the test cases. However, we can use the --gtest_filter parameter to specify running only certain test cases, for example, --gtest_filter='CacheTest.*' only runs the test cases related to LRU cache. The result is as follows:
Test cases can help better understand the code logic. During the process of reading the code, sometimes we want to verify some logic, so we can modify the test cases a bit. For example, I deliberately broke a test case that could pass:
1 | --- a/util/cache_test.cc |
After modifying the test case, you need to recompile leveldb_tests. Because we configured the project’s compilation options during the previous compilation, CMake has already cached them, so the following command automatically uses the previous configuration items, such as -DCMAKE_BUILD_TYPE=Debug, etc.
1 | cmake --build . --target leveldb_tests |
Note that from the output above, you can see that only the modified file was recompiled here, generating a new object file cache_test.cc.o, so the compilation speed is very fast. After running it again, you’ll see that the test case doesn’t pass, as shown below:
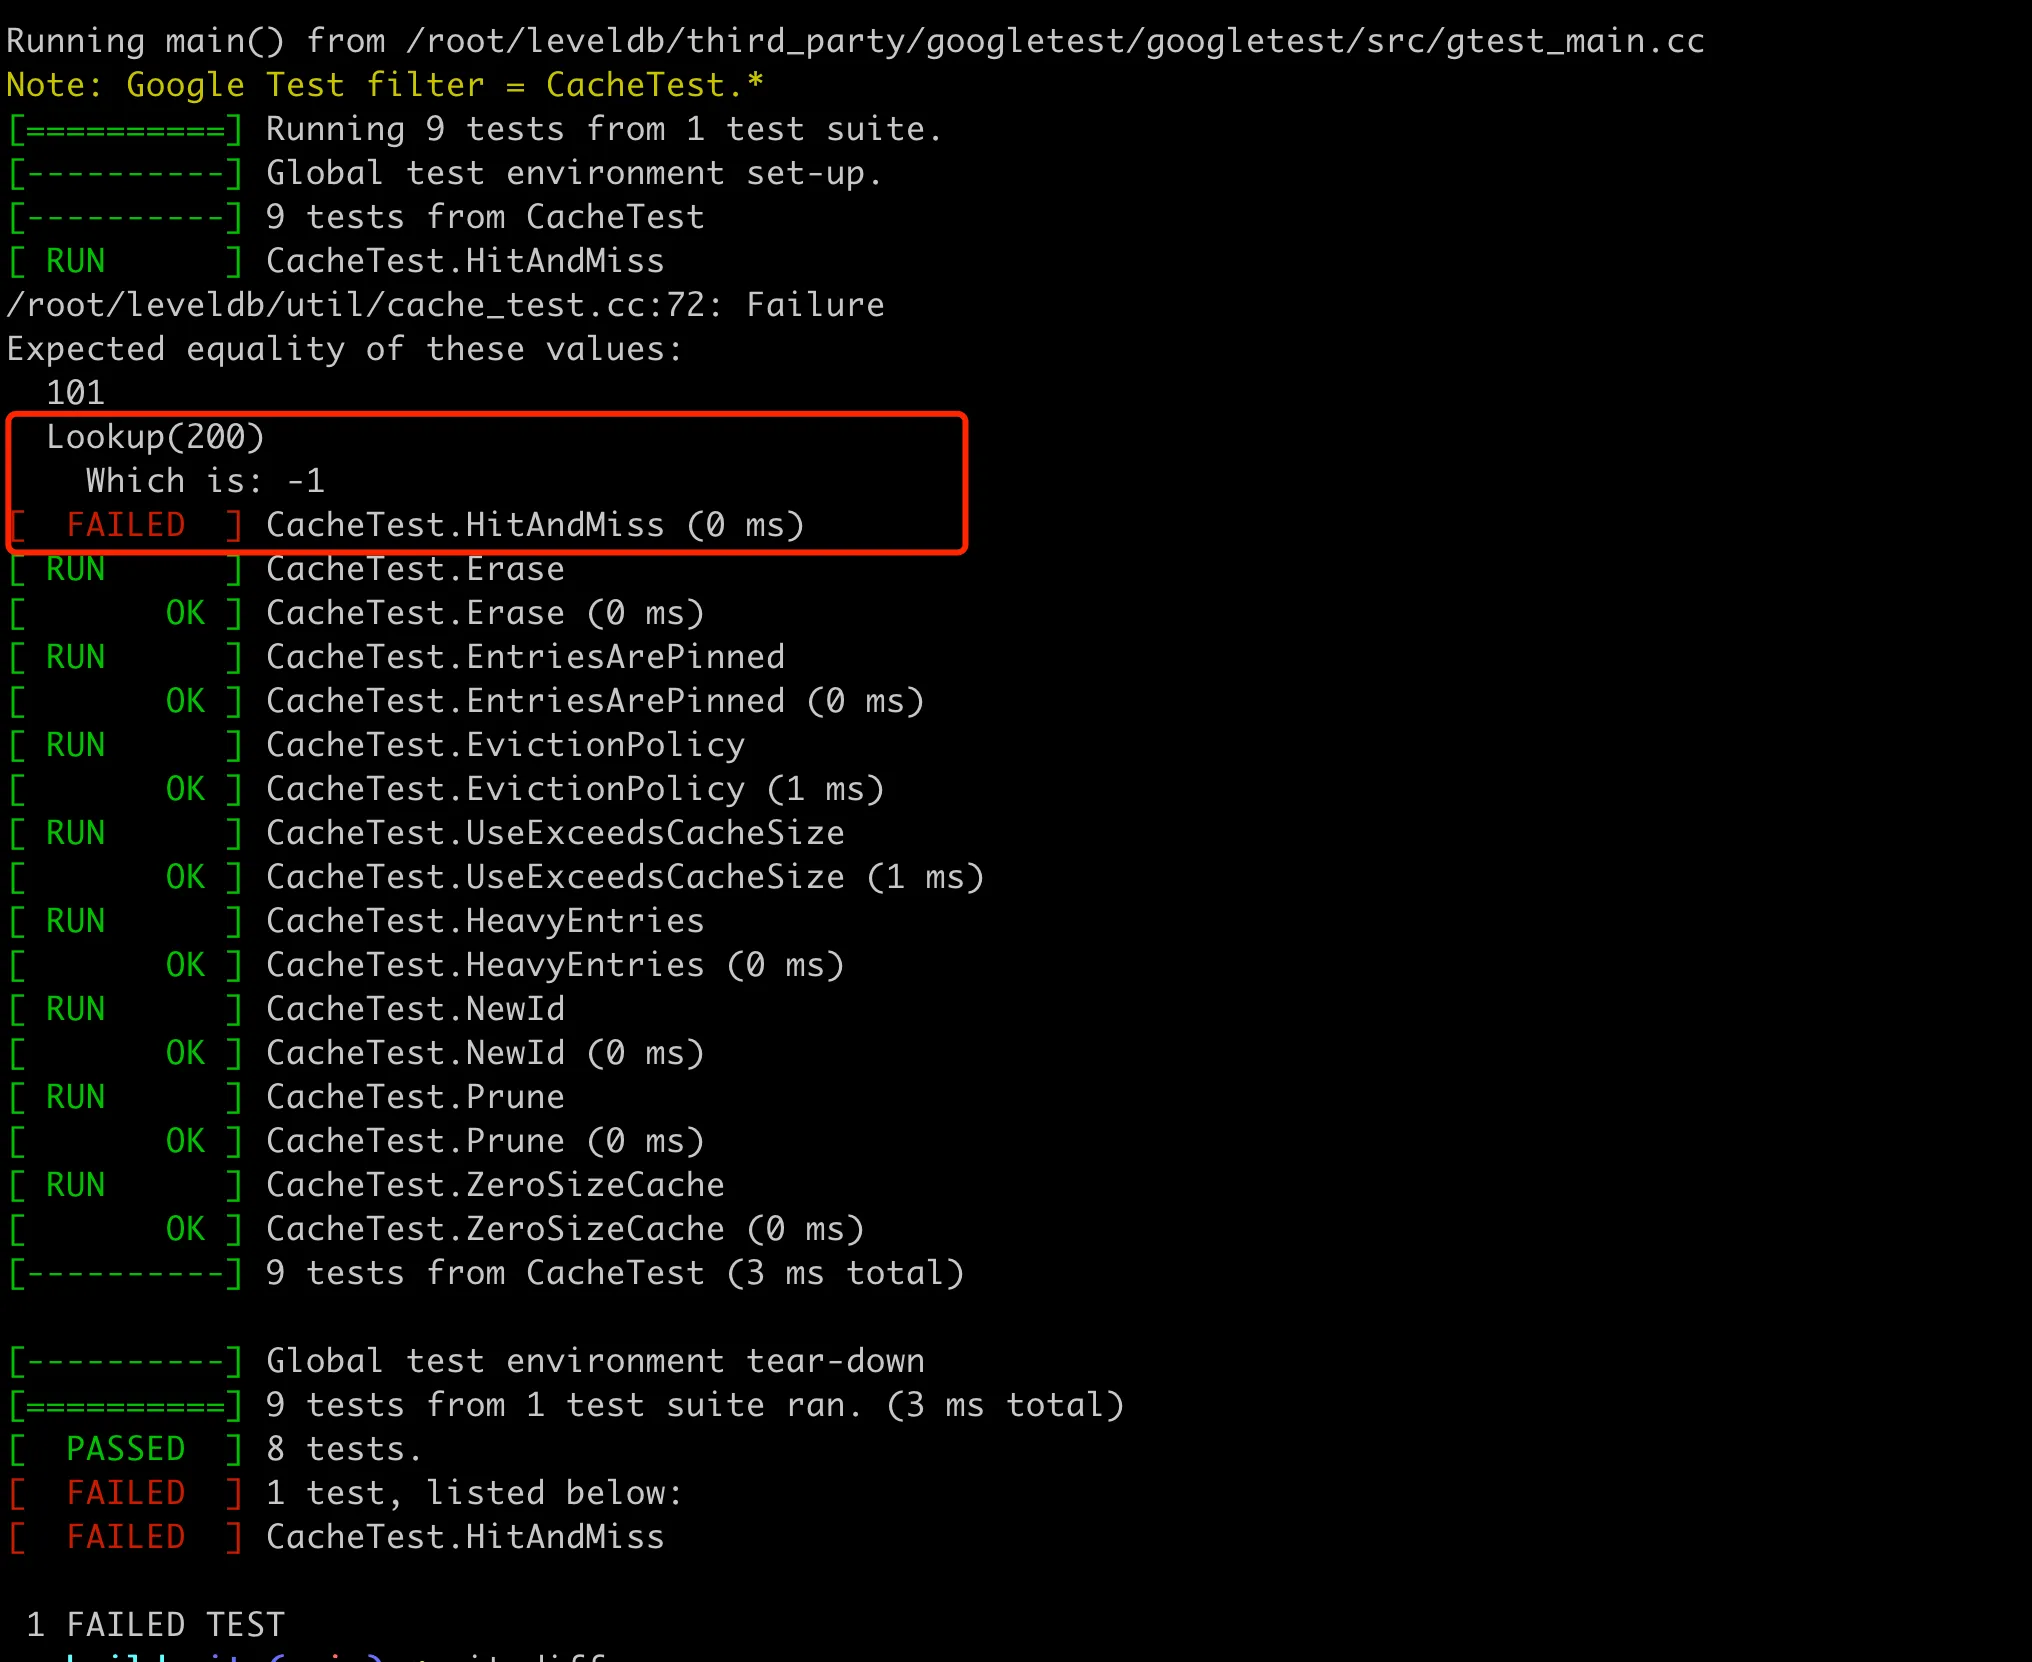
You can see the specific reason for the test case validation failure. During the process of reading the code, you can modify the test cases of some code at any time to verify whether your understanding is correct.
Summary
Following this article, everyone should be able to quickly prepare the development environment for LevelDB. After configuring the IDE, compiling the source code, running simple read and write examples and test cases, let’s start reading the source code together!

